Verify Users
The Mizuhiki SDK offers a simple and convenient way to complete compliant Electronic Know Your Customer (eKYC) verification in Japan. We provide pre-built UIs you can use to guide your users through the verification process.
Make sure you have already completed the SDK installation steps from our Getting Started guide.
1. Initialize the SDK
Create an SDK instance (mock or production) by passing in your project ID obtained from JSC. You can use this SDK instance to access all Mizuhiki ID functionality.
Required: Replace YOUR_PROJECT_ID with the actual project ID provided by JSC during beta access setup.
- iOS
- Android
import MizuhikiCore
import MizuhikiMock
import Mizuhiki

// Define your app environment with Mizuhiki client
class AppEnvironment: ObservableObject {
    // Replace with your actual project ID from JSC
    private let mizuhikiProjectId = "YOUR_PROJECT_ID"

    lazy var mizuhiki: IdentityClient = {
        #if DEBUG
        // Use mock environment for development and testing
        return MizuhikiMock.makeClient(projectId: mizuhikiProjectId)
        #else
        // Use production environment for release builds
        return Mizuhiki.makeClient(projectId: mizuhikiProjectId)
        #endif
    }()

    // Shared instance for app-wide usage
    static let shared = AppEnvironment()
}

// Usage in SwiftUI
struct ContentView: View {
    @StateObject private var appEnv = AppEnvironment.shared

    var body: some View {
        VStack {
            Text("Mizuhiki SDK Ready")
            // Use appEnv.mizuhiki for all Mizuhiki operations
        }
        .environmentObject(appEnv)
    }
}
import android.content.Context
import androidx.compose.runtime.Composable
import androidx.compose.runtime.remember
import androidx.compose.ui.platform.LocalContext
import dev.jsc.mizuhiki.adapter.mock.MizuhikiMockFactory
import dev.jsc.mizuhiki.adapter.prod.MizuhikiProdFactory
import dev.jsc.mizuhiki.core.IdentityClient

// Helper class to manage Mizuhiki client lifecycle
class MizuhikiManager private constructor() {
    companion object {
        // Replace with your actual project ID from JSC
        private const val PROJECT_ID = "YOUR_PROJECT_ID"

        fun createClient(context: Context, useMock: Boolean = BuildConfig.DEBUG): IdentityClient {
            return if (useMock) {
                // Use mock environment for development and testing
                MizuhikiMockFactory.makeClient(context, PROJECT_ID)
            } else {
                // Use production environment for release builds
                MizuhikiProdFactory.makeClient(context, PROJECT_ID)
            }
        }
    }
}

// Usage in Composable
@Composable
fun HomeScreen() {
    val context = LocalContext.current
    val mizuhikiClient = remember(context) {
        MizuhikiManager.createClient(context)
    }

    // Use mizuhikiClient for all Mizuhiki operations
    Text("Mizuhiki SDK Ready")
}
Important Notes:
- 🔑 Project ID: Must match the ID provided in your JSC credentials
- 🏗️ Environment: Mock for development, Production for release
- 💾 Instance Management: Create one client instance per app session
- 🔄 Lifecycle: Client handles connection management automatically
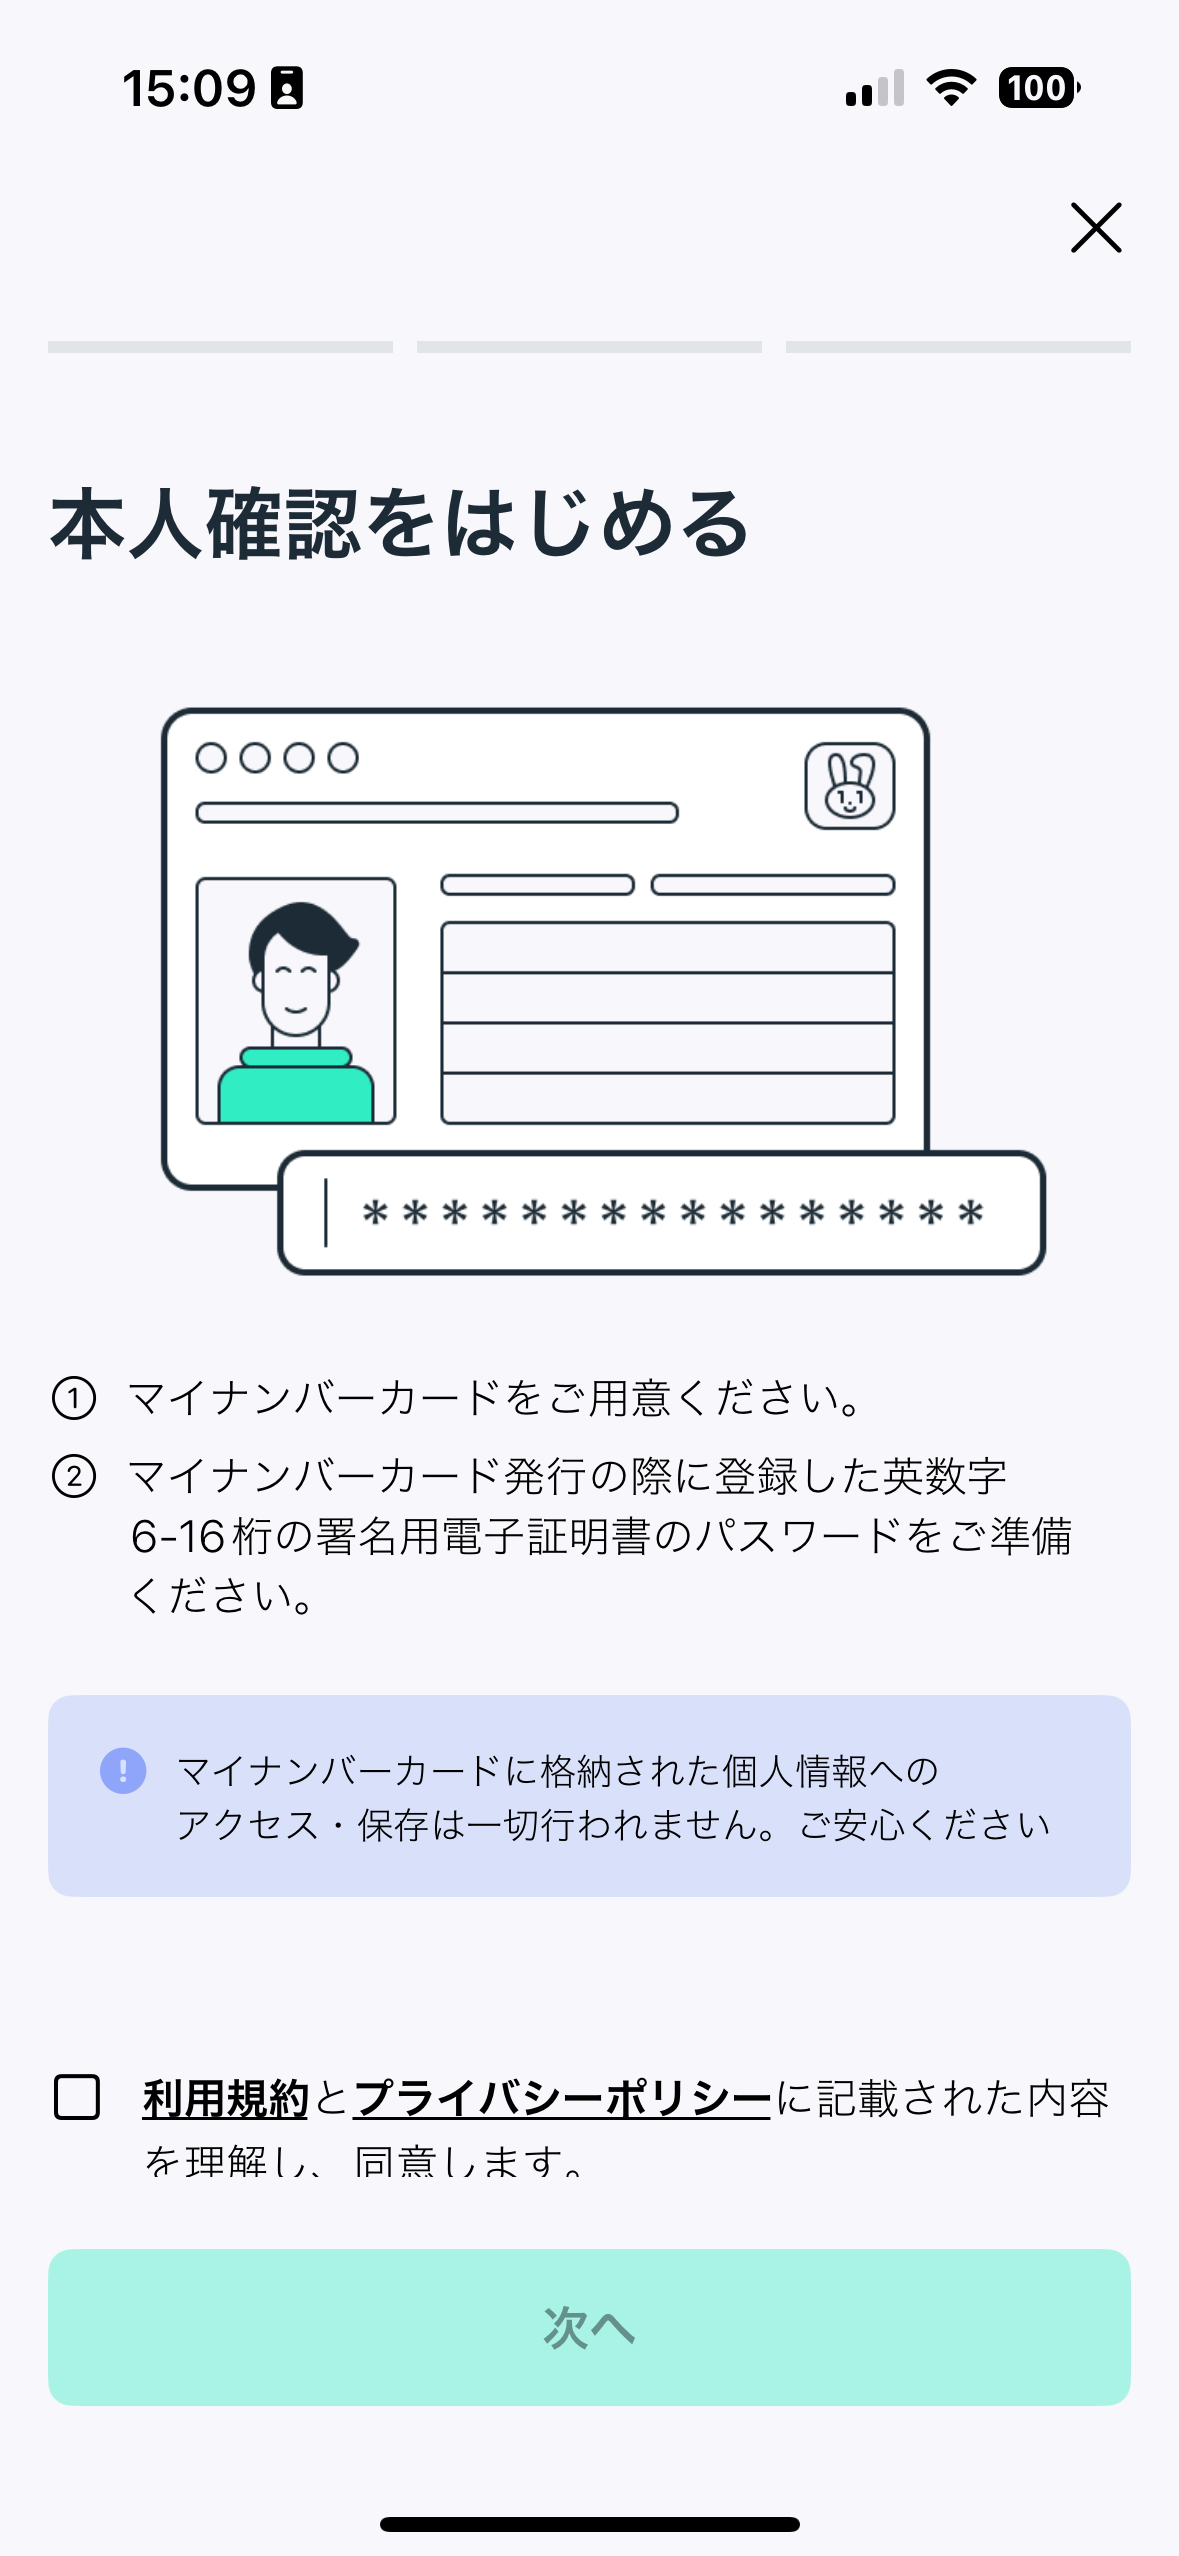
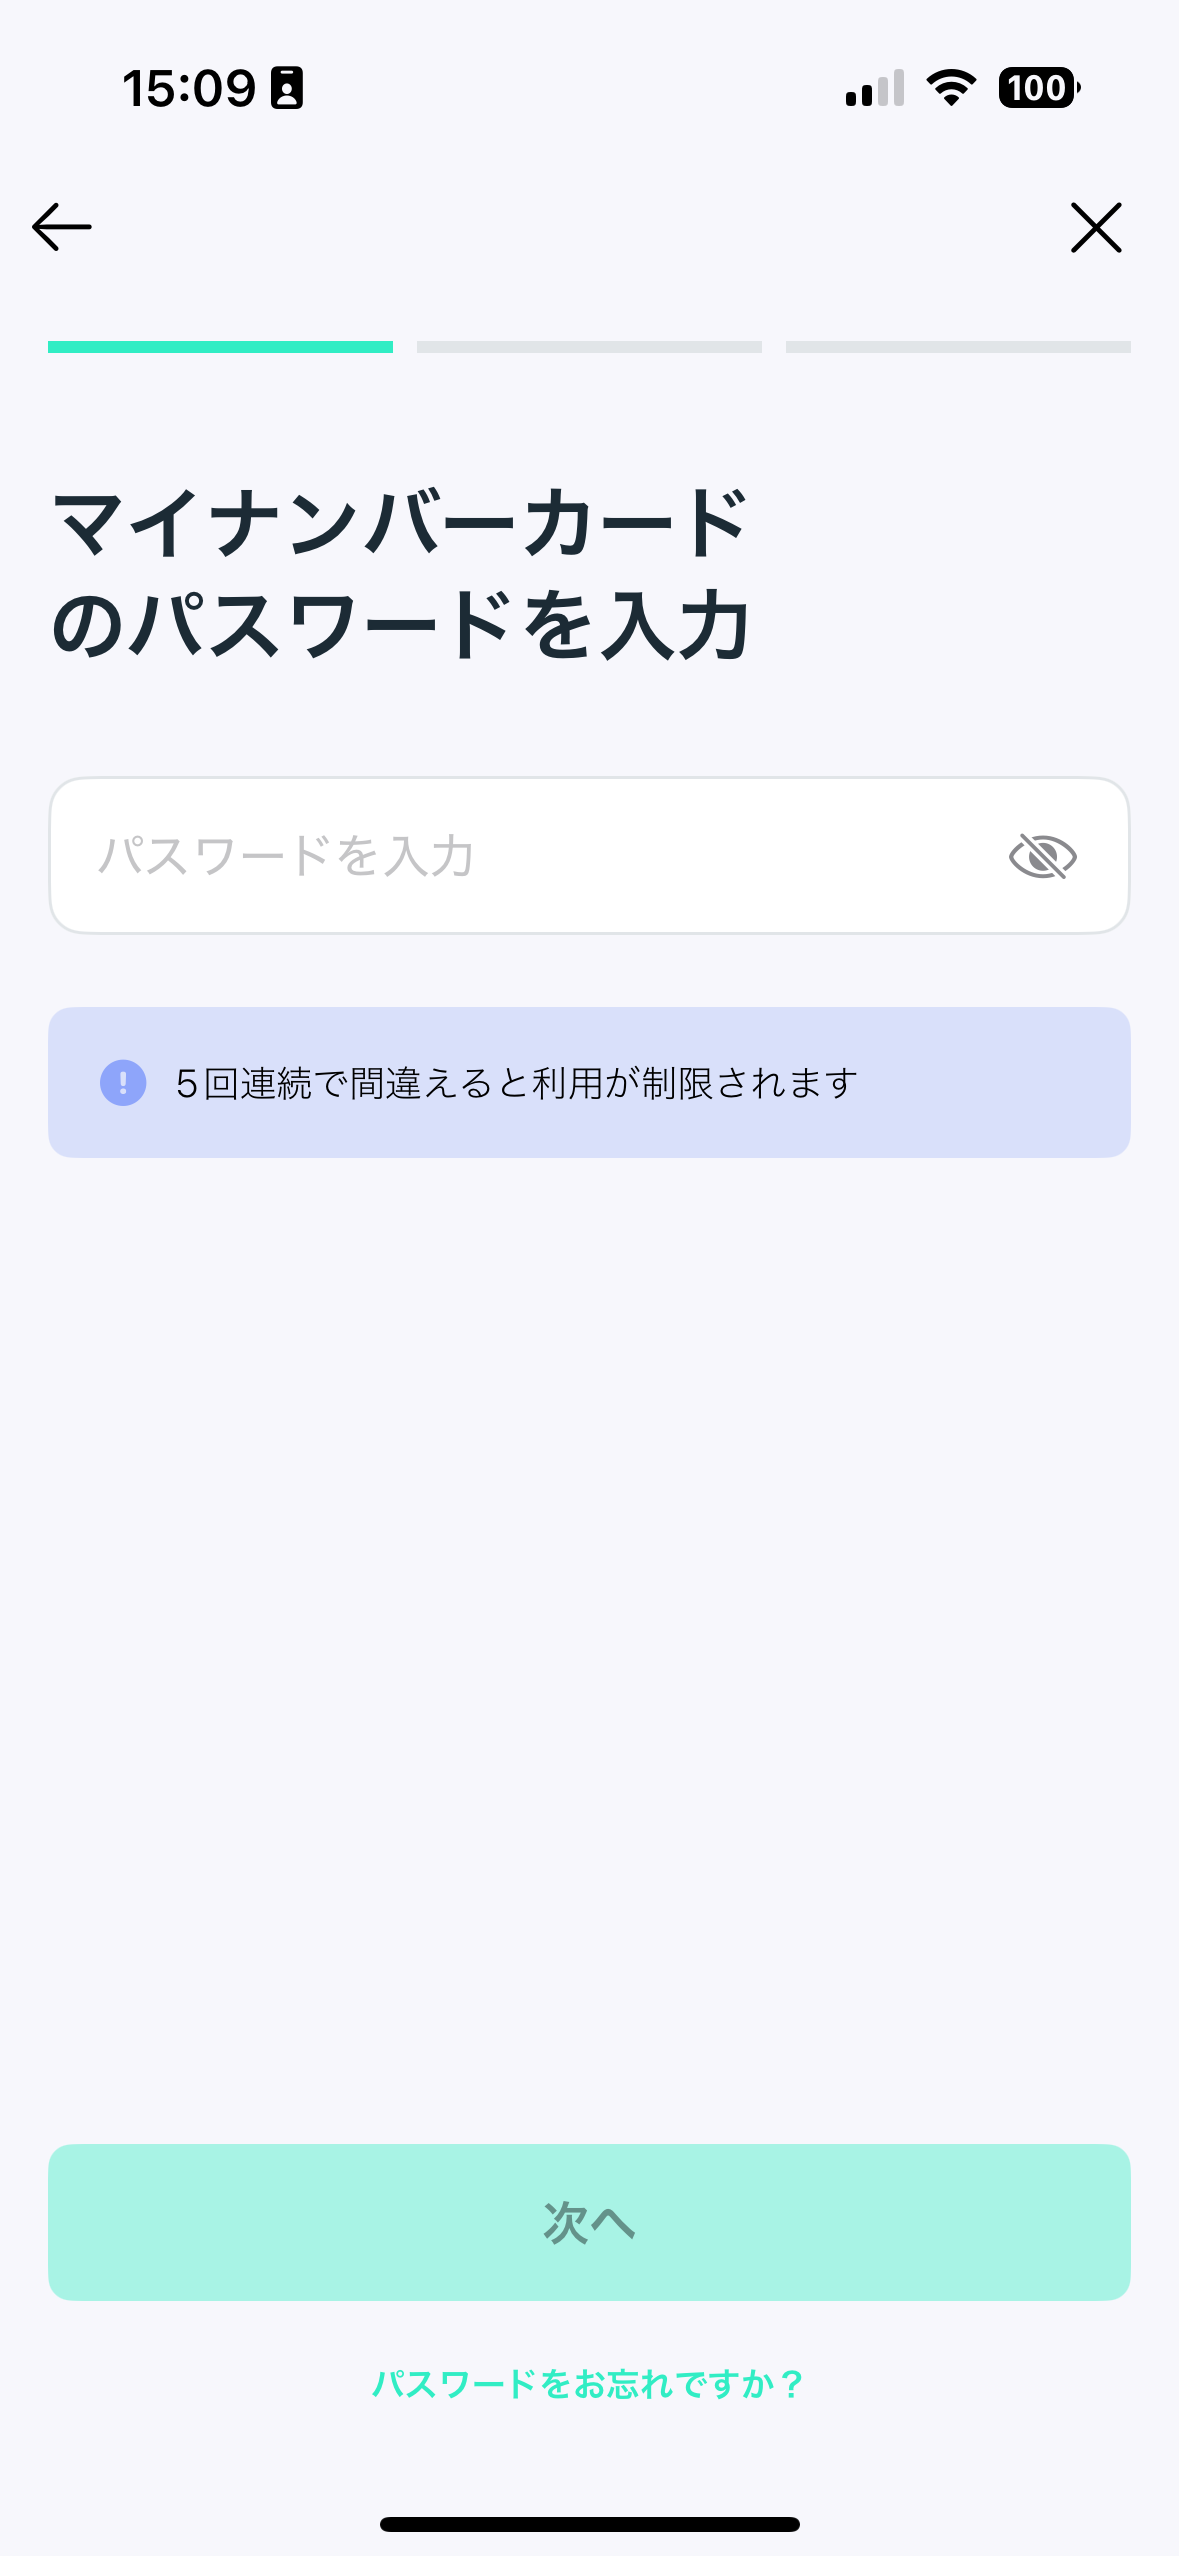
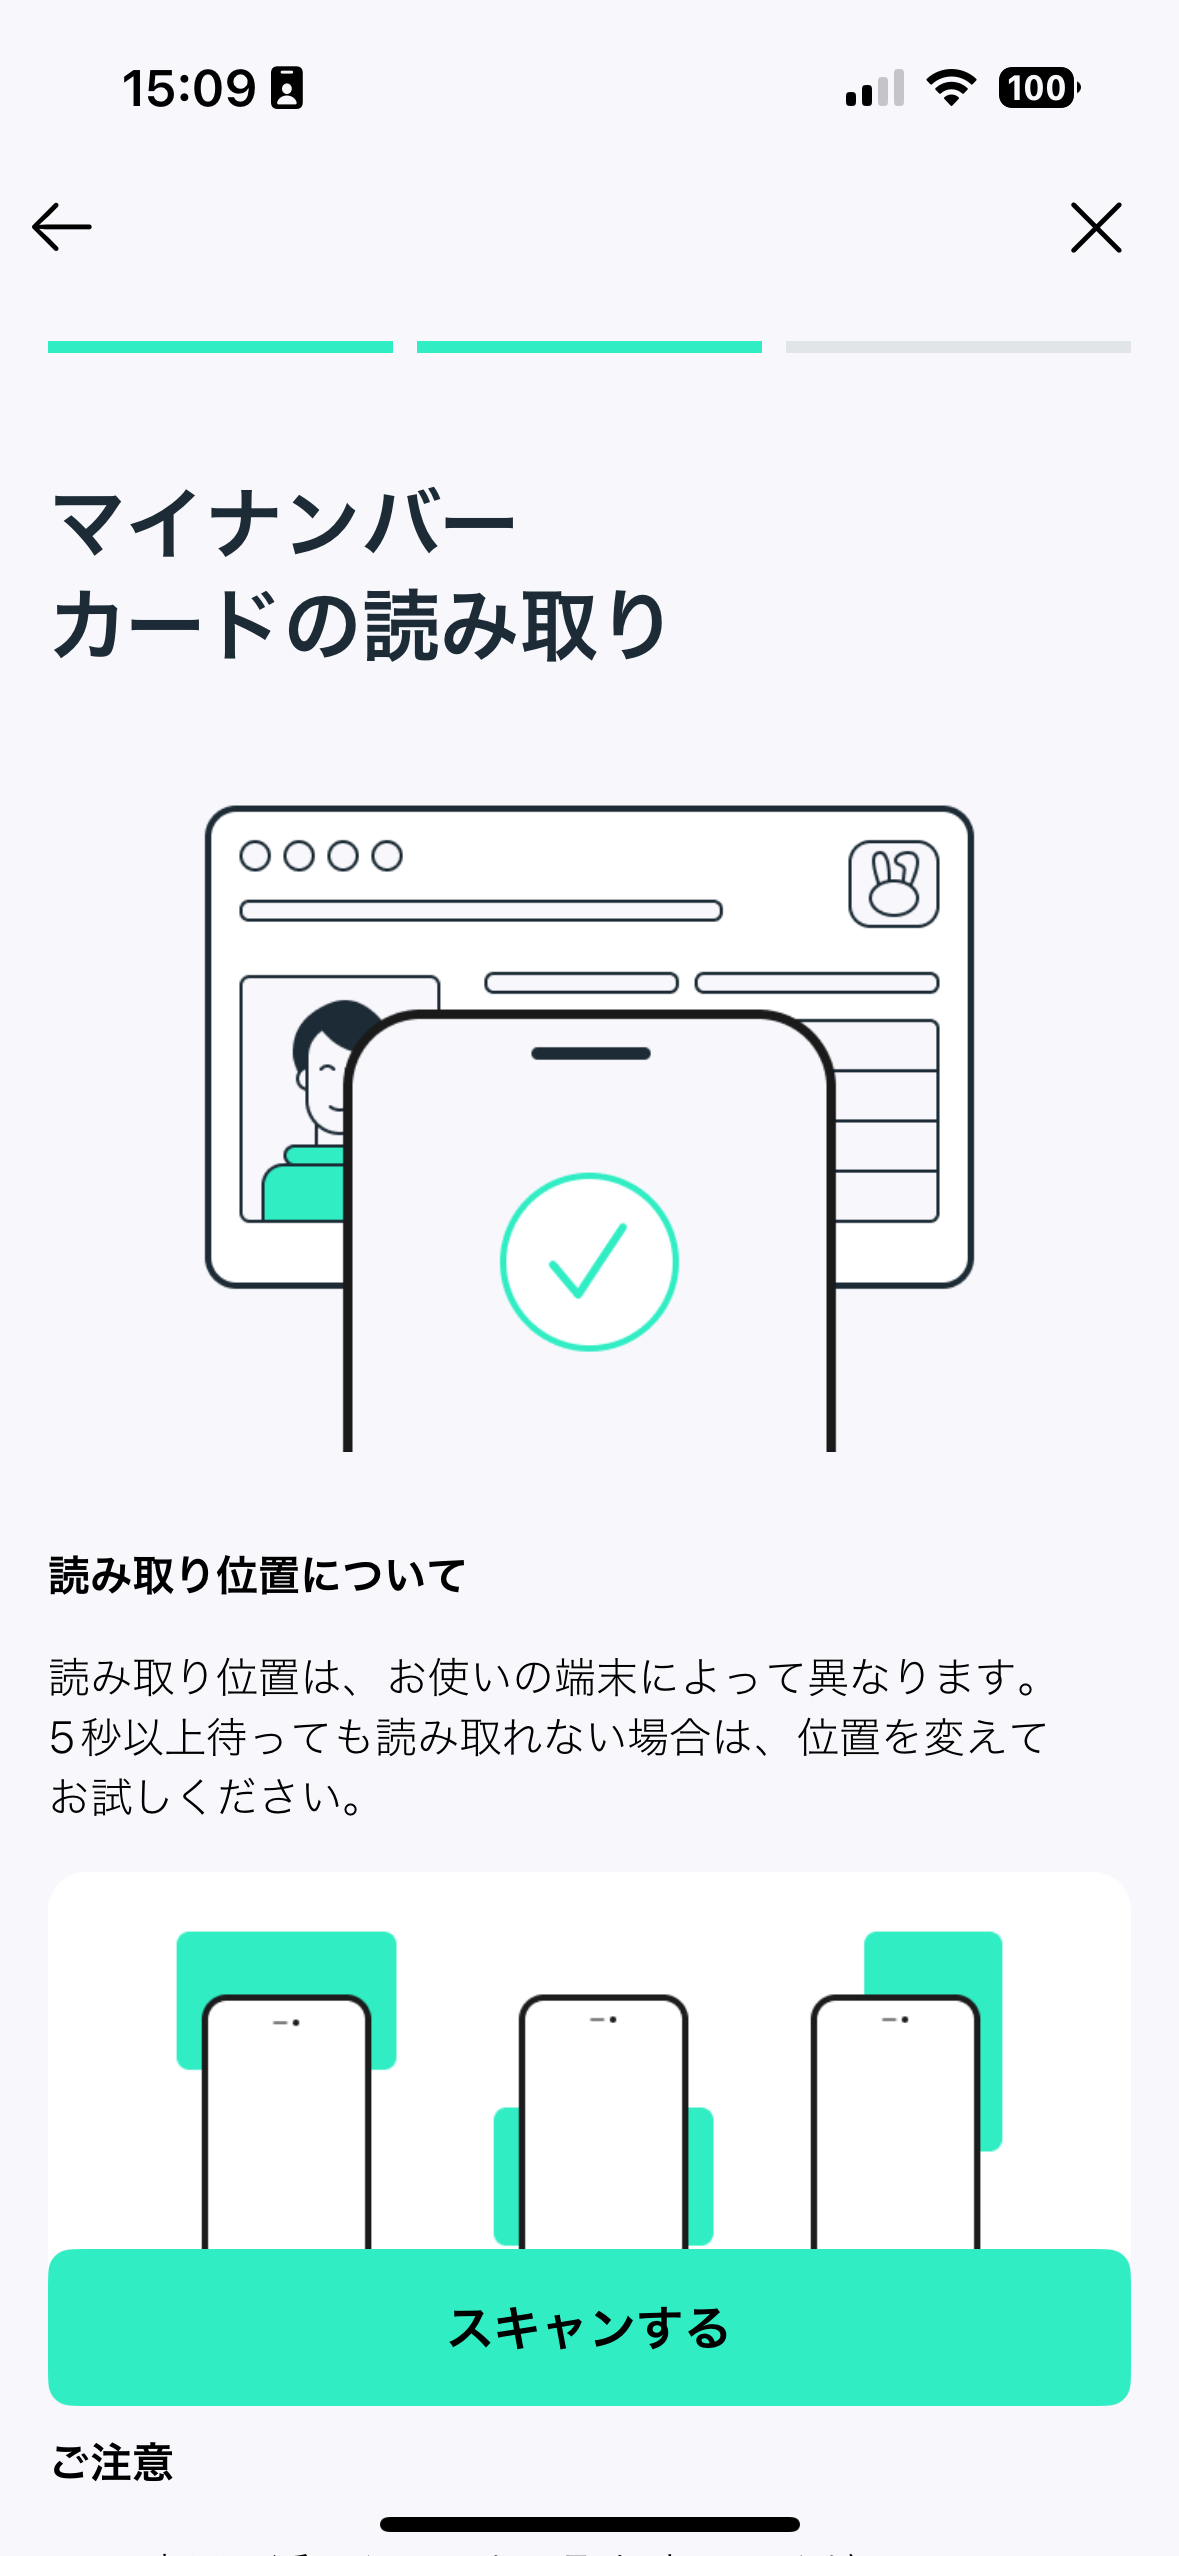
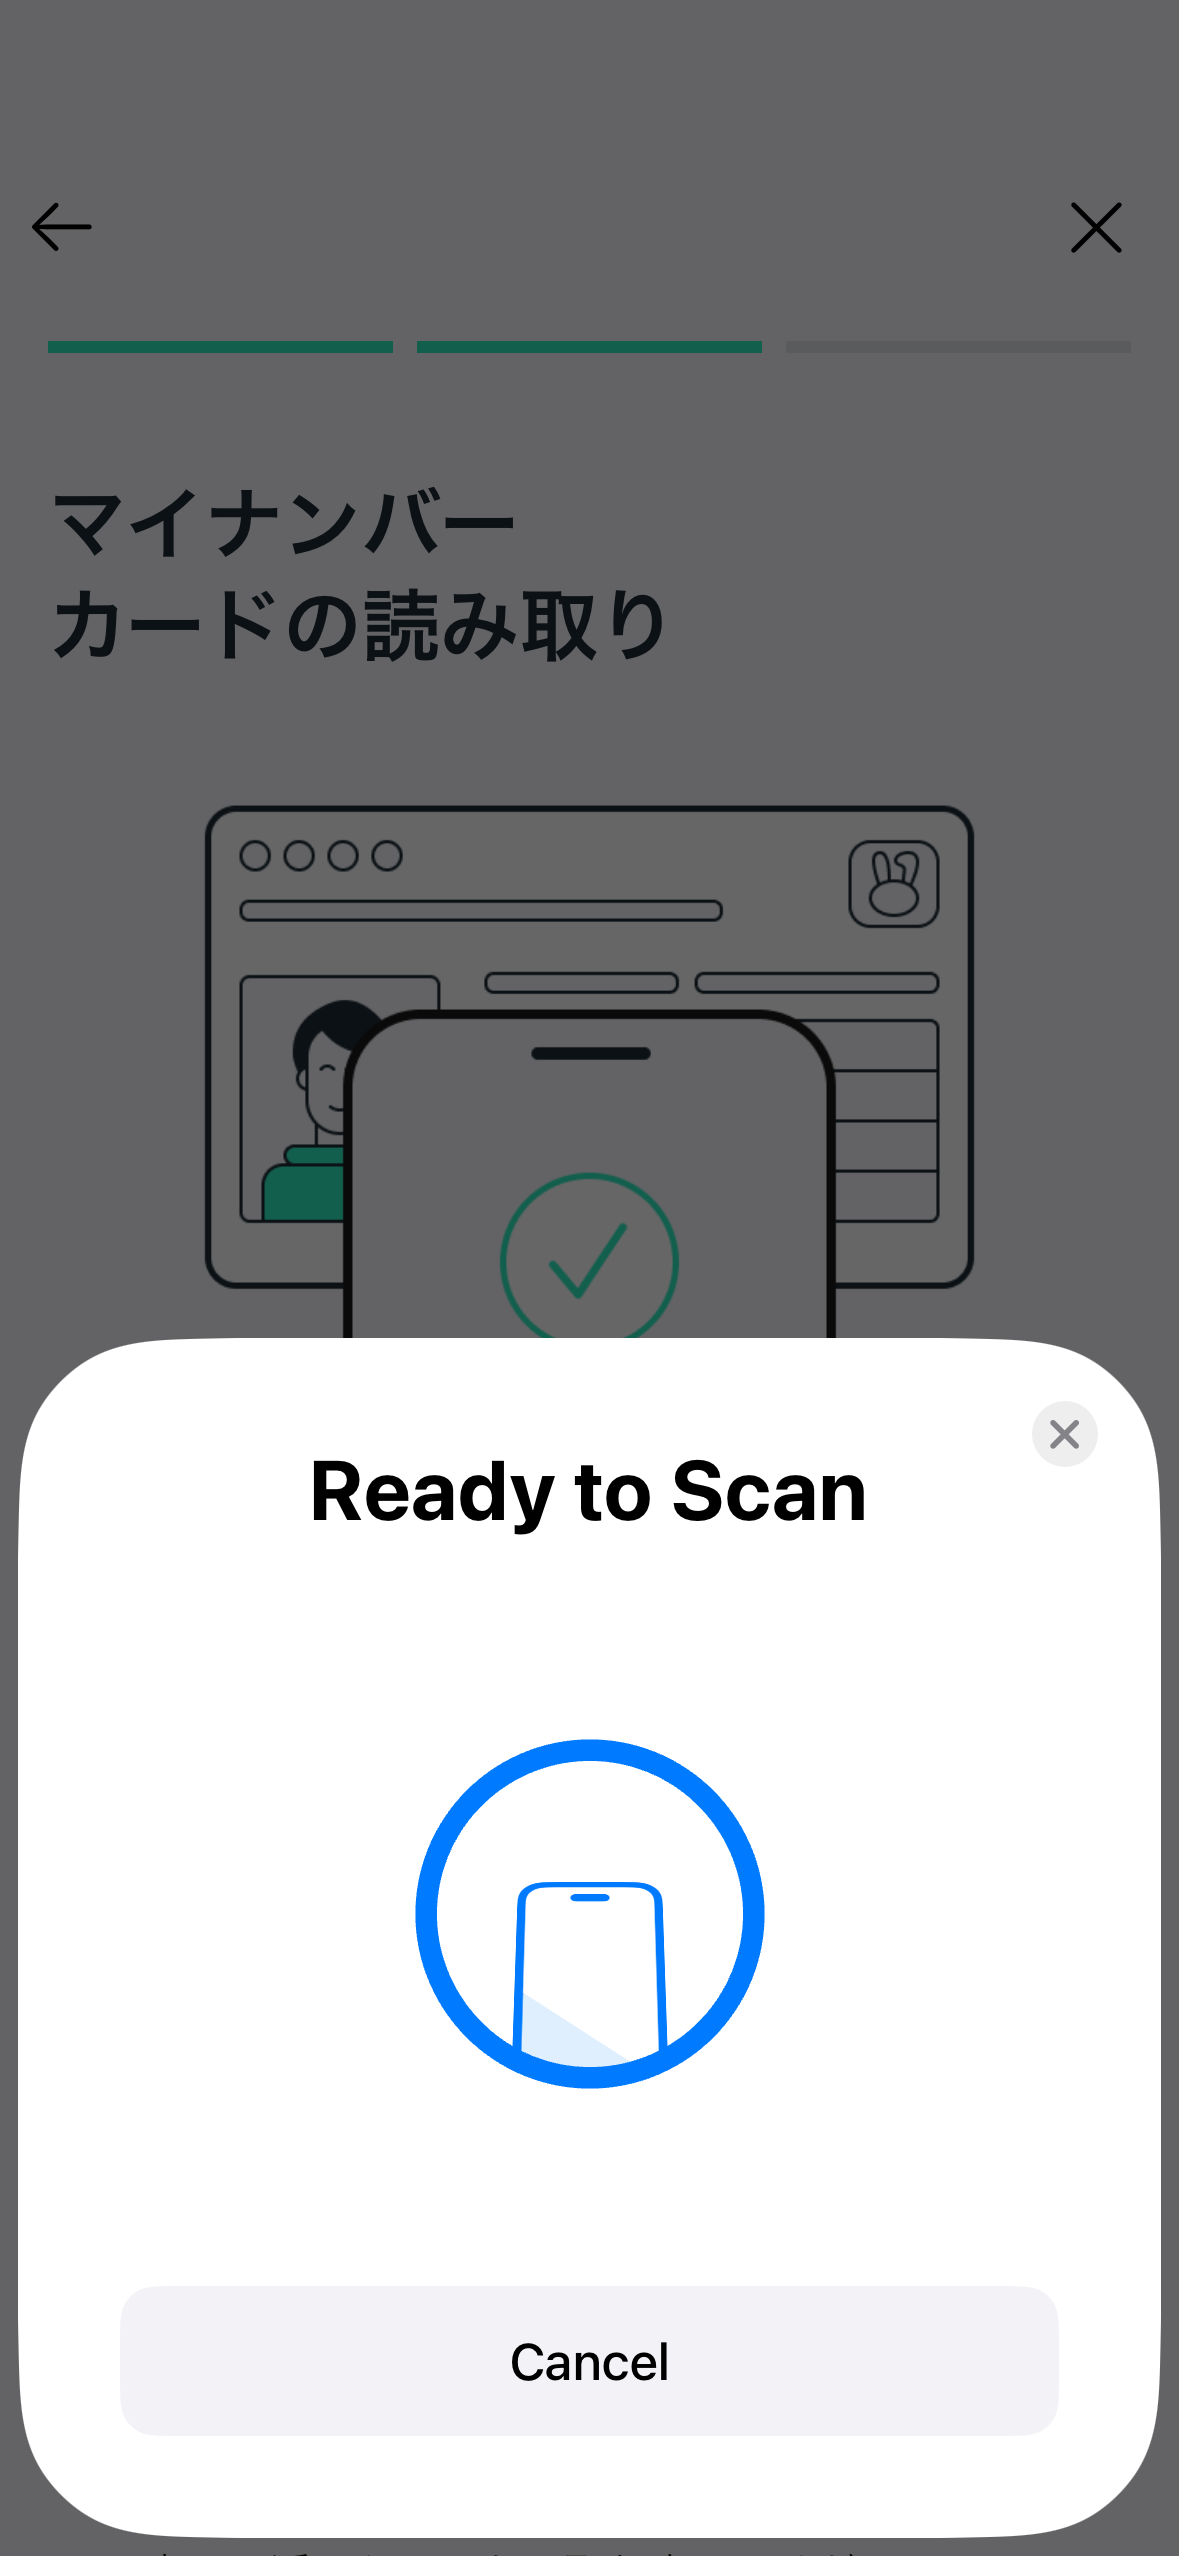
2. Use the built-in Mizuhiki UIs to complete KYC
The Mizuhiki SDK comes with a pre-built UI flow to guide users through the KYC process.
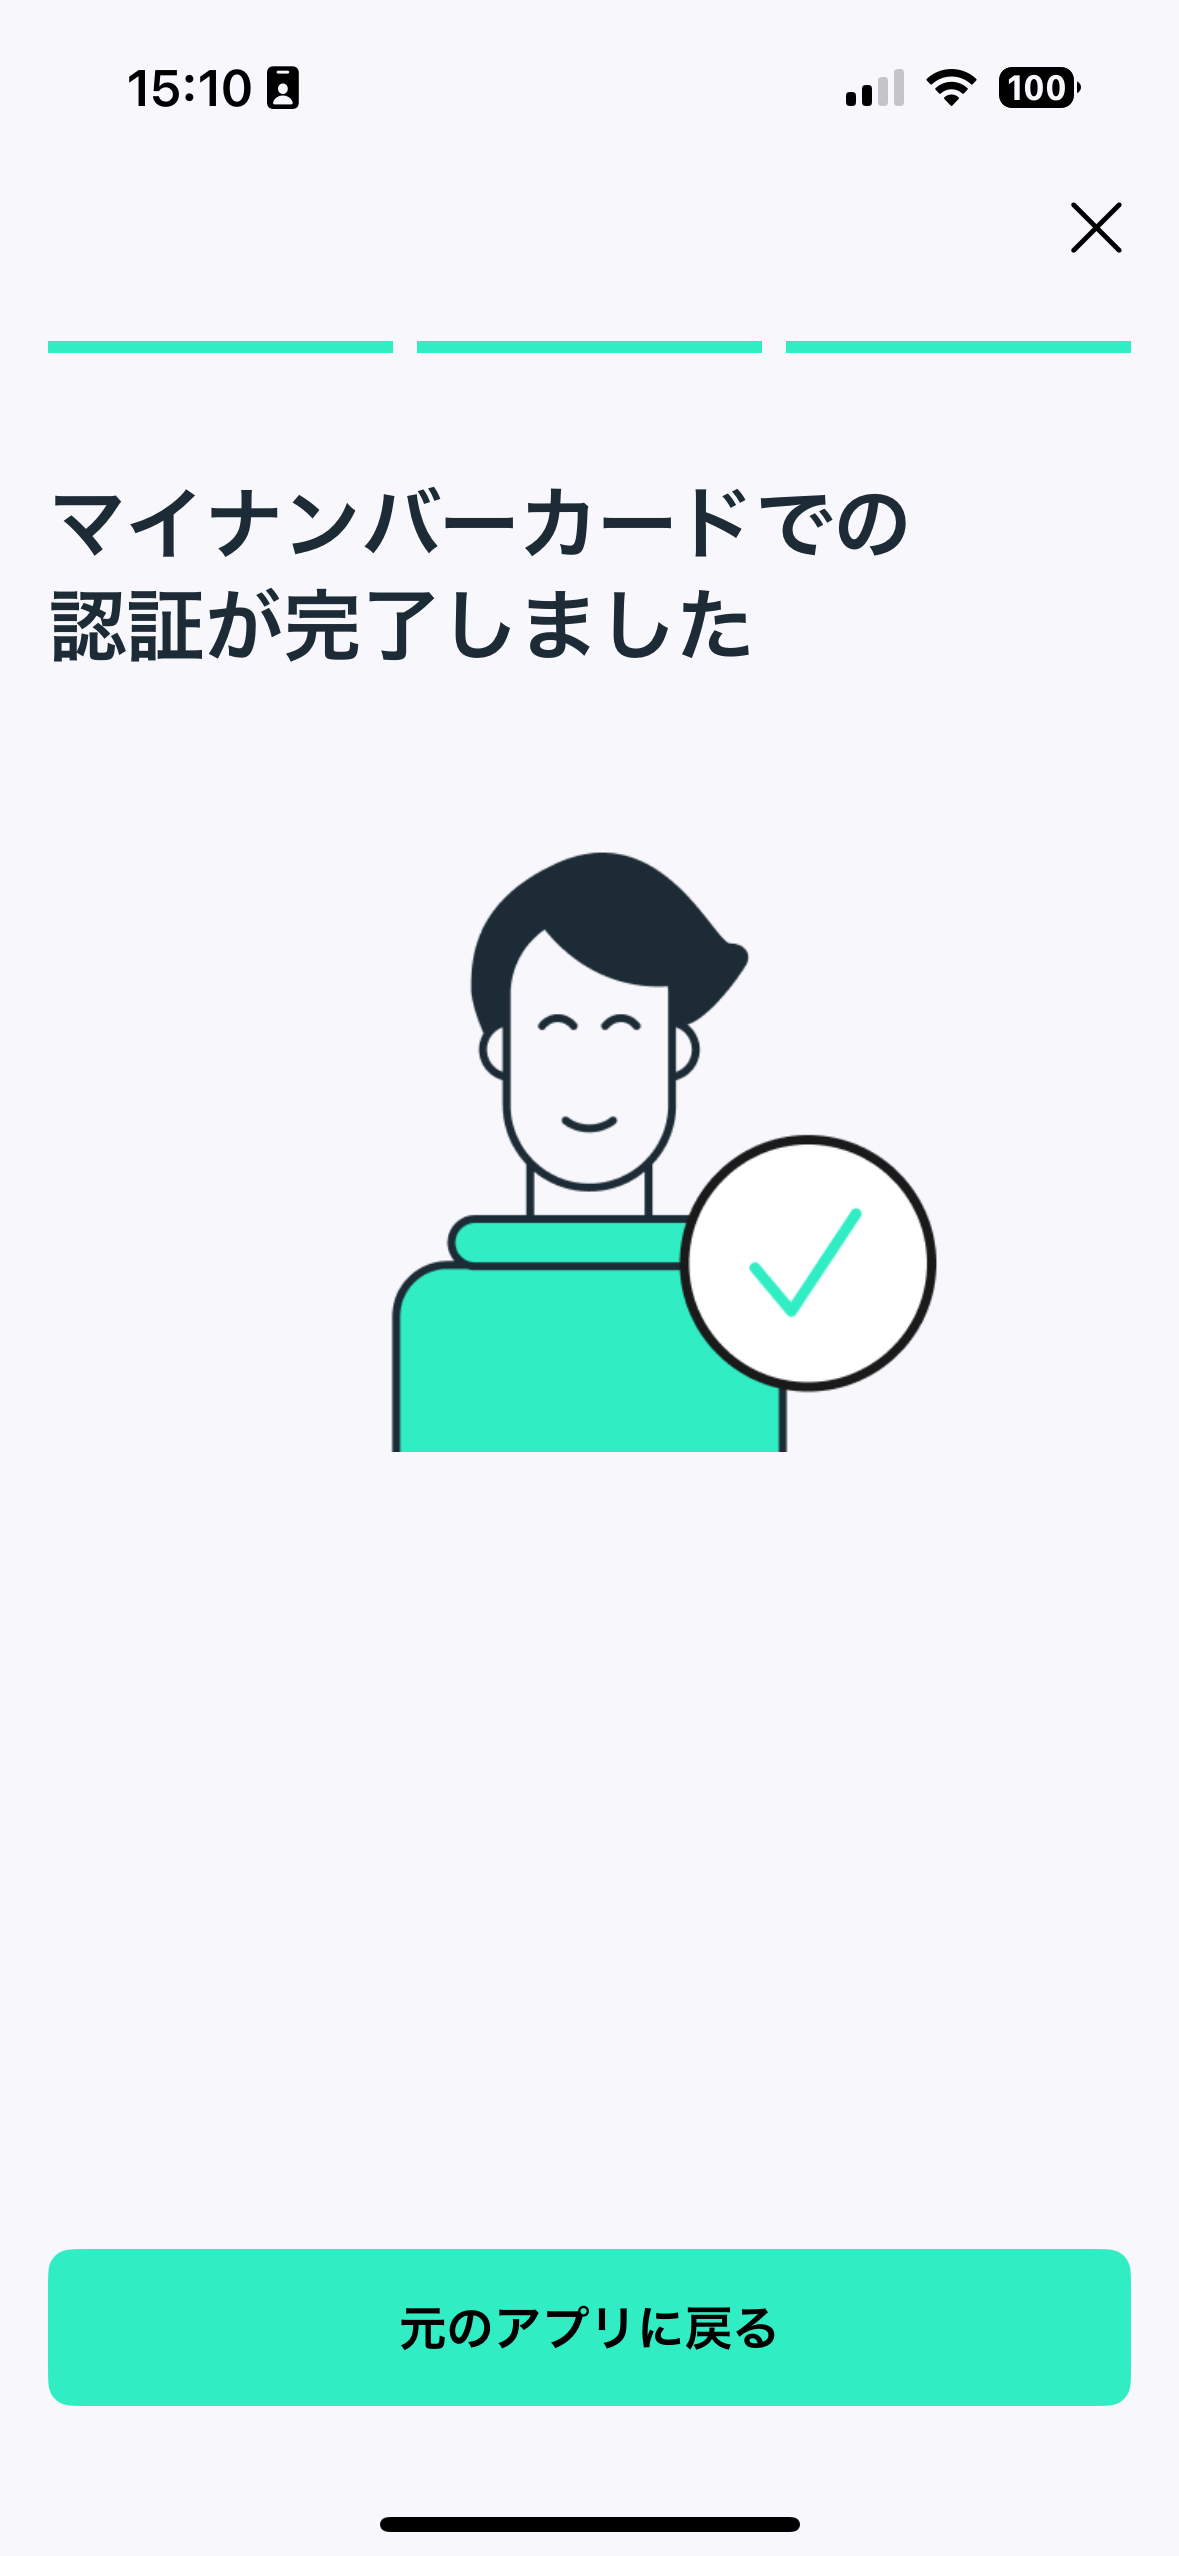
The KYC process includes the following screens:
- Introduction screen with explanation of the process
- Password entry screen
- MyNumber card scanning instructions
- NFC scanning in progress
- Success screen
User information format
After successful KYC, the SDK returns the user's personal information (name, date of birth, address, gender) encrypted as a JWE object.
Send this JWE to your backend for decryption and processing. Do not decrypt user information (PII) in the mobile app.
| Parameter | Type | Required | Description | Example |
|---|---|---|---|---|
address | String | Yes | Residential address | 徳島県板野町犬伏9番8 |
dateOfBirth | String | Yes | Date of birth in western calendar | 2000-12-25 |
fullName | String | Yes | Full name | 山中 逸穂 |
gender | Enum (female | male | other) | Yes | Gender | male |
- iOS
- Android
import MizuhikiCore
import MizuhikiUI

struct ContentView: View {
    @Environment(\.appEnv) private var appEnv

    var body: some View {
        VStack {
            Button(action: kyc) {
                Text("KYC")
                    .padding(8)
                    .fontWeight(.semibold)
                    .frame(maxWidth: .infinity)
            }
        }
    }

    @State private var signedUpUser: MizuhikiCore.User?
    private func onSignUp() {
        MizuhikiUIBridge.present(config: .init(client: appEnv.mizuhiki)) { event in
            switch event {
            case .didStart:
                break
            case .didFinish(let result):
                self.signedUpUser = result.user
                // submit the encrypted JWE to your backend for decryption and storage, see details in the next step
                submitEncryptedPii(jwe: result.kycDetails)
            case .didCancel:
                break
            }
        }
    }
}
package com.example.jscdapp

import android.os.Bundle
import android.util.Log
import androidx.activity.ComponentActivity
import androidx.activity.compose.setContent
import androidx.activity.enableEdgeToEdge
import android.content.Context
import androidx.compose.foundation.layout.Arrangement
import androidx.compose.foundation.layout.Column
import androidx.compose.foundation.layout.fillMaxSize
import androidx.compose.foundation.layout.padding
import androidx.compose.material3.Button
import androidx.compose.material3.Scaffold
import androidx.compose.material3.Text
import androidx.compose.runtime.Composable
import androidx.compose.ui.Alignment
import androidx.compose.ui.Modifier
import androidx.compose.runtime.remember
import androidx.compose.ui.platform.LocalContext
import androidx.compose.ui.unit.dp
import androidx.compose.ui.tooling.preview.Preview
import com.example.jscdapp.ui.theme.JSCDAppTheme
import dev.jsc.mizuhiki.adapter.mock.MizuhikiMockFactory
import dev.jsc.mizuhiki.adapter.prod.MizuhikiFactory
import dev.jsc.mizuhiki.core.IdentityClient
import dev.jsc.mizuhiki.ui.MizuhikiUIBridge
import dev.jsc.mizuhiki.ui.UIConfig


class MainActivity : ComponentActivity() {
    override fun onCreate(savedInstanceState: Bundle?) {
        super.onCreate(savedInstanceState)
        enableEdgeToEdge()
        setContent {
            JSCDAppTheme {
                HomeScreen(name = "Android")
            }
        }
    }
}

// Helper class to manage Mizuhiki client lifecycle
class MizuhikiManager private constructor() {
    companion object {
        // Replace with your actual project ID from JSC
        private const val PROJECT_ID = "YOUR_PROJECT_ID"

        fun makeClient(context: Context, useMock: Boolean = (BuildConfig.FLAVOR == "mock")): IdentityClient {
            return if (useMock) {
                // Use mock environment for development and testing
                MizuhikiMockFactory.makeClient(context, PROJECT_ID)
            } else {
                // Use production environment for release builds
                MizuhikiFactory.makeClient(context, PROJECT_ID)
            }
        }
    }
}

@Composable
fun HomeScreen(name: String, modifier: Modifier = Modifier) {
    val context = LocalContext.current
    val client = remember(context) {
        MizuhikiManager.makeClient(context)
    }
    Scaffold(modifier = Modifier.fillMaxSize()) { innerPadding ->
          Column(
              modifier = modifier
                  .fillMaxSize()
                  .padding(innerPadding)
                  .padding(16.dp),
              verticalArrangement = Arrangement.Center,
              horizontalAlignment = Alignment.CenterHorizontally
          ) {
              Text(
                  text = "Hello $name!",
                  modifier = modifier
              )
              Button(onClick = {
                  MizuhikiUIBridge.present(
                      context,
                      config = UIConfig(client = client),
                      onEvent = { event ->
                          Log.i("mizuhiki-ui", event.toString())
                          when (event) {
                              UIEvent.DidStart, UIEvent.DidCancel -> Unit
                              // handle successful KYC and submit the encrypted JWE to your backend for decryption and storage, see details in the next step
                              is UIEvent.DidFinish -> onKycSuccess(event.result.user, event.result.kycDetails)
                          }
                      })
              }) {
                  Text("Start KYC")
              }
        }
    }
}
3. Forward encrypted user information (JWE) to your backend
When KYC completes, your app receives encrypted user personal information in JWE format.
Pass it directly to your backend API over HTTPS.
- iOS
- Android
// Example payload you send to your backend after successful KYC
struct KycResultPayload: Encodable {
    let encryptedPiiJwe: String
}

func submitEncryptedPii(_ jwe: String) async throws {
    let payload = KycResultPayload(encryptedPiiJwe: jwe)
    // POST payload to your backend over HTTPS
}
// Example payload you send to your backend after successful KYC
@Serializable
data class KycResultPayload(
    val encryptedPiiJwe: String
)

suspend fun submitEncryptedPii(jwe: String) {
    val payload = KycResultPayload(encryptedPiiJwe = jwe)
    // POST payload to your backend over HTTPS
}
4. Decrypt JWE on your backend
Use your private key generated during setup to decrypt the JWE and parse the user information payload.
import { compactDecrypt, CompactJWEHeaderParameters } from "jose";
import { createPrivateKey } from "node:crypto";

type KycPiiGender = "female" | "male" | "other";

interface KycPii {
   // in ""徳島県板野町犬伏9番8" format
   address: string;

   // in "2000-12-25" basic ISO format
   dateOfBirth: string;

   // in "山中 逸穂" format
   fullName: string;
   gender: KycPiiGender;
}

interface DecryptedKycPii {
   pii: KycPii;
   protectedHeader: CompactJWEHeaderParameters;
}

export async function decryptMizuhikiPii(jwe: string): Promise<DecryptedKycPii> {
  const privateKeyPem = process.env.MIZUHIKI_PII_PRIVATE_KEY_PEM;
  if (!privateKeyPem) {
    throw new Error("Missing MIZUHIKI_PII_PRIVATE_KEY_PEM");
  }

  const privateKey = createPrivateKey(privateKeyPem);
  const { plaintext, protectedHeader } = await compactDecrypt(jwe, privateKey);

  const json = new TextDecoder().decode(plaintext);
  const pii = JSON.parse(json) as KycPii;

  return { pii, protectedHeader };
}
Backend handling requirements:
- Accept JWE only over TLS (HTTPS).
- Decrypt only on trusted server infrastructure.
- Avoid logging raw JWE or decrypted PII.
- Apply least-privilege access controls to decrypted data.
Identity verification flow with the Mizuhiki ID
Next Steps
After completing KYC, you are ready to mint a Mizuhiki Verified SBT to the user's address
Continue to: SBT Minting Guide →
Troubleshooting
Common Issues and Solutions
NFC-Related Issues
Issue: NFC Permission Denied
- Symptoms: App crashes when attempting to scan MyNumber card
- iOS Solution:
- Verify NFC capability is added in Xcode project settings
- Check
Info.plistcontainsNFCReaderUsageDescription - Ensure device supports NFC (iPhone 7+ for NFC reading)
- Android Solution:
- Add
<uses-permission android:name="android.permission.NFC" />toAndroidManifest.xml - Verify device has NFC hardware and it's enabled in settings
- Add
Issue: Card Not Detected
- Symptoms: NFC scanning doesn't detect the card
- Solutions:
- Remove card from wallet/case - avoid interference
- Hold card steady against device's NFC area for at least 5 seconds
- Try different positioning - NFC antenna location varies by device
- Ensure card is not damaged or demagnetized
Authentication Issues
Issue: Invalid Project ID
- Symptoms: Authentication errors during SDK usage (
"message": "permission denied: invalid x-project-id") - Solution: Verify project ID matches exactly the one provided by JSC (case-sensitive)
Issue: Mock Environment Card Rejection
- Symptoms: Valid FeliCa card rejected in mock environment
- Solution:
- Confirm using mock SDK version (
mizuhiki-adapter-mock) - Use password
ABC123for all mock cards - Verify card is FeliCa or ISO/IEC 14443-4 Type-A compatible
- Confirm using mock SDK version (
Issue: Production Password Lock
- Symptoms: MyNumber card becomes unusable after failed attempts
- Solution:
- Visit convenience store (7-Eleven, FamilyMart) with card and ID
- Use card reader terminal to unlock with PIN reset procedure
- Alternative: Visit city hall for manual unlock process
Integration Issues
Issue: Build Errors with Package Registry
- Symptoms: Cannot resolve Mizuhiki SDK dependencies
- iOS Solution:
# Re-authenticate with package registry
swift package-registry login https://swift.cloudsmith.io/jsc/mizuhiki/ --token YOUR_TOKEN --no-confirm

# Clear Xcode derived data
rm -rf ~/Library/Developer/Xcode/DerivedData - Android Solution:
# Verify environment variable is set
echo $MIZUHIKI_TOKEN

# Clean and rebuild project
./gradlew clean
./gradlew build
Issue: UI Bridge Not Responding
- Symptoms: KYC UI doesn't appear or callbacks not triggered
- iOS Solution:
- Ensure UI calls are on main thread
- Verify
MizuhikiUIframework is imported - Check if client instance is properly initialized
- Android Solution:
- Verify context is valid Activity context
- Check if UI permissions are granted
- Ensure client is created before UI presentation
Getting Help
If you encounter issues not covered here:
- Check SDK Version: Ensure you're using the latest SDK version
- Contact Support: Email [email protected] with:
- SDK version and platform (iOS/Android)
- Environment (mock/production)
- Complete error messages and stack traces
- Minimal reproduction code example